介绍 Vue-Test-UtilsVue.js 官方的单元测试实用工具库,它提供了一系列的 API 来使得我们可以很便捷的去写 Vue 应用中的单元测试。
主流的单元测试运行器有很多,比如 JestMochaKarma 等,这几个在 Vue-Test-Utils 文档里都有对应的教程,这里我们只介绍 Vue-Test-Utils + Jest 结合的示例。
Jest 是一个由 Facebook 开发的测试框架。Vue 对其进行描述:是功能最全的测试运行器。它所需的配置是最少的,默认安装了 JSDOM,内置断言且命令行的用户体验非常好。不过你需要一个能够将单文件组件导入到测试中的预处理器。我们已经创建了 vue-jest 预处理器来处理最常见的单文件组件特性,但仍不是 vue-loader 100% 的功能。
环境配置 通过脚手架 vue-cli 来新建项目的时候,如果选择了 Unit Testing 单元测试且选择的是 Jest 作为测试运行器,那么在项目创建好后,就会自动配置好单元测试需要的环境,直接能用 Vue-Test-Utils 和 Jest 的 API 来写测试用例了。
但是新建项目之初没有选择单元测试功能,需要后面去添加的话,有两种方案:
第一种配置:
直接在项目中添加一个 unit-jest
第二种配置:
这种配置会麻烦一点,下面是具体的操作步骤。
安装依赖
配置 Jest Jest 的配置可以在 package.json 里配置;也可以新建一个文件 jest.config.js, 放在项目根目录即可。这里我选择的是配置在 jest.config.js 中:
1
2
3
4
5
6
7
8
9
10
11
12
13
module .exports = { moduleFileExtensions: ['js' , 'vue' ], transform: { '^.+\\.vue$' : '<rootDir>/node_modules/vue-jest' , '^.+\\.js$' : '<rootDir>/node_modules/babel-jest' , }, moduleNameMapper: { '^@/(.*)$' : '<rootDir>/src/$1' , }, snapshotSerializers: ['jest-serializer-vue' ], testMatch: ['**/__tests__/**/*.spec.js' ], transformIgnorePatterns: ['<rootDir>/node_modules/' ], }
各配置项说明:
moduleFileExtensions 告诉 Jest 需要匹配的文件后缀transform 匹配到 .vue 文件的时候用 vue-jest 处理, 匹配到 .js 文件的时候用 babel-jest 处理moduleNameMapper 处理 webpack 的别名,比如:将 @ 表示 /src 目录snapshotSerializers 将保存的快照测试结果进行序列化,使得其更美观testMatch 匹配哪些文件进行测试transformIgnorePatterns 不进行匹配的目录
配置 package.json 写一个执行测试的命令脚本:
1
2
3
4
5
{ "script" : { "test" : "jest" } }
第一个测试用例 为了保证环境的一致性,我们从创建项目开始一步一步演示操作步骤。
用 vue-cli 创建一个项目 当前我用到的是 3.10.0 版本的 vue-cli。开始创建项目:
1 vue create first-vue-jest
选择 Manually select features 进行手动选择功能配置:
1
2
3
4
5
6
7
8
Vue CLI v3.10.0 ┌───────────────────────────┐ │ Update available: 4.0.4 │ └───────────────────────────┘ ? Please pick a preset: VUE-CLI3 (vue-router, node-sass, babel, eslint) default (babel, eslint) ❯ Manually select features
勾选 Babel、Unit Testing:
1
2
3
4
5
6
7
8
9
10
? Check the features needed for your project: ◉ Babel ◯ TypeScript ◯ Progressive Web App (PWA) Support ◯ Router ◯ Vuex ◯ CSS Pre-processors ◯ Linter / Formatter ◉ Unit Testing ◯ E2E Testing
选择 Jest:
1
2
3
? Pick a unit testing solution: Mocha + Chai ❯ Jest
选择 In dedicated config files 将各配置信息配置在对应的 config 文件里:
1
2
3
? Where do you prefer placing config for Babel, PostCSS, ESLint, etc.? (Use arrow keys) ❯ In dedicated config files In package.json
输入 n,不保存预设:
1 ? Save this as a preset for future projects? (y/N) n
项目创建完成后,部分文件的配置信息如下:
babel.config.js:
1
2
3
module .exports = { presets: ['@vue/cli-plugin-babel/preset' ], }
jest.config.js, 这个文件的配置默认是预设插件的,可以按实际需求改成上面提到的配置 Jest 里的配置一样。
1
2
3
module .exports = { preset: '@vue/cli-plugin-unit-jest' , }
package.json:
1
2
3
4
5
6
7
8
9
10
11
12
13
14
15
16
17
18
19
20
21
{ "name" : "first-vue-jest" , "version" : "0.1.0" , "private" : true , "scripts" : { "serve" : "vue-cli-service serve" , "build" : "vue-cli-service build" , "test:unit" : "vue-cli-service test:unit" }, "dependencies" : { "core-js" : "^3.1.2" , "vue" : "^2.6.10" }, "devDependencies" : { "@vue/cli-plugin-babel" : "^4.0.0" , "@vue/cli-plugin-unit-jest" : "^4.0.0" , "@vue/cli-service" : "^4.0.0" , "@vue/test-utils" : "1.0.0-beta.29" , "vue-template-compiler" : "^2.6.10" } }
执行测试命令 用上面的步骤创建的项目完成项目后,我们可以在 package.json 的 scripts 项中看到有个 test:unit ,执行它:
1
2
cd first-vue-jest npm run test:unit
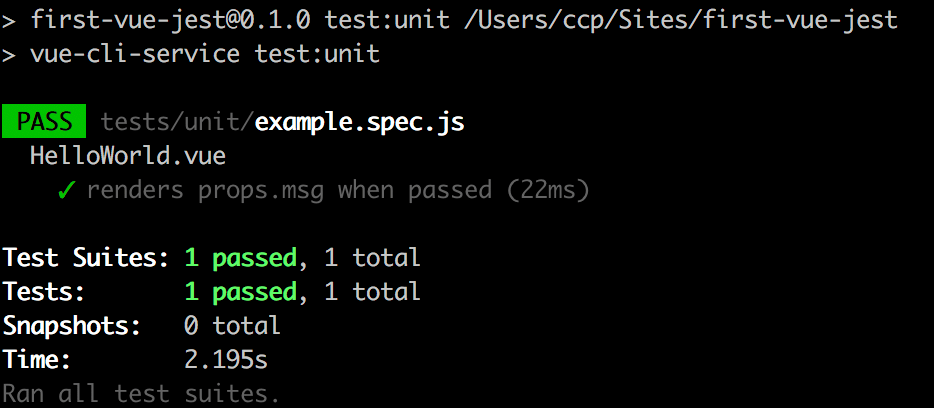
然后终端里会看到输出结果,PASS 表示测试用例通过了,这个是官方提供单元测试例子。下面我们来写点自己的东西。
实现一个 ToDoList
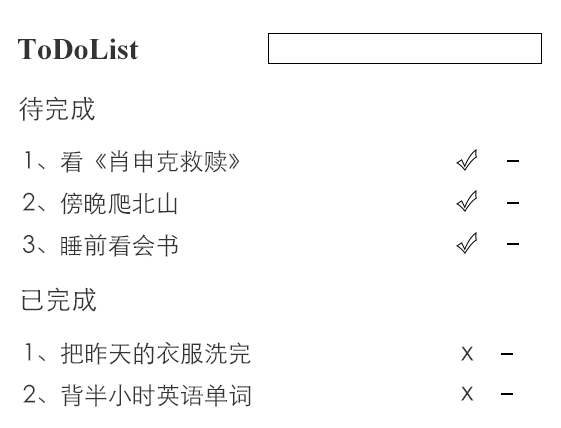
看上面的原型图,有这么几点明确的需求:
在头部右侧输入框输入要做的事情,敲回车后,内容跑到待完成列表里,同时清空输入框
输入框为空的时候敲回车,不做任何变化
待完成列表支持编辑功能,已完成列表不能进行编辑
每个列表项的右侧都有删除按钮,用 - 号表示,点击后删除该项
待完成列表有标记为已完成的按钮,用 √ 号表示,点击后当前项移动到已完成列表
已完成列表有标记为未完成的按钮,用 x 号表示,点击后当前项移动到未完成列表
列表序号从 1 开始递增
当待完成列表为空的时候,不显示待完成字样
当已完成列表为空的时候,不显示已完成字样
先把上面的页面写好 写页面之前先把创建项目的时候生成的 HelloWorld.vue 和对应的测试文件 example.spec.js 删除;同时修改 App.vue 文件,引入 ToDoList 组件:
1 2 3 4 5 6 7 8 9 10 11 12 13 14 15 <template > <div id ="app" > <ToDoList > </ToDoList > </div > </template > <script > import ToDoList from './components/ToDoList' export default { components: { ToDoList } } </script >
在 src/compoents 下新建一个文件 ToDoList.vue,样式较多就不贴出来了,具体可以去看本项目源码 :
1 2 3 4 5 6 7 8 9 10 11 12 13 14 15 16 17 18 19 20 21 22 23 24 25 26 27 28 29 30 31 32 33 34 35 36 37 <template > <div class ="todolist" > <header > <h5 > ToDoList</h5 > <input class ="to-do-text" v-model ="toDoText" @keyup.enter ="enterText" placeholder ="输入计划要做的事情" /> </header > <h4 v-show ="toDoList.length > 0" > 待完成</h4 > <ul class ="wait-to-do" > <li v-for ="(item, index) in toDoList" :keys ="item" > <p > <i > {{index + 1}}</i > <input :value ="item" @blur ="setValue(index, $event)" type ="text" /> </p > <p > <span class ="move" @click ="removeToComplete(item, index)" > √</span > <span class ="del" @click ="deleteWait(index)" > -</span > </p > </li > </ul > <h4 v-show ="completedList.length > 0" > 已完成</h4 > <ul class ="has-completed" > <li v-for ="(item, index) in completedList" :keys ="item" > <p > <i > {{index + 1}}</i > <input :value ="item" disabled ="true" type ="text" /> </p > <p > <span class ="move" @click ="removeToWait(item, index)" > x</span > <span class ="del" @click ="deleteComplete(index)" > -</span > </p > </li > </ul > </div > </template >
1
2
3
4
5
6
7
8
9
10
11
12
13
14
15
16
17
18
19
20
21
22
23
24
25
26
27
28
29
30
31
32
33
34
35
36
<script> export default { data() { return { toDoText: '' , toDoList: [], completedList: [] } }, methods: { setValue(index, e) { this .toDoList.splice(index, 1 , e.target.value) }, removeToComplete(item, index) { this .completedList.splice(this .completedList.length, 0 , item) this .toDoList.splice(index, 1 ) }, removeToWait(item, index) { this .toDoList.splice(this .toDoList.length, 0 , item) this .completedList.splice(index, 1 ) }, enterText() { if (this .toDoText.trim().length > 0 ) { this .toDoList.splice(this .toDoList.length, 0 , this .toDoText) this .toDoText = '' } }, deleteWait(index) { this .toDoList.splice(index, 1 ) }, deleteComplete(index) { this .completedList.splice(index, 1 ) } } }; </script>
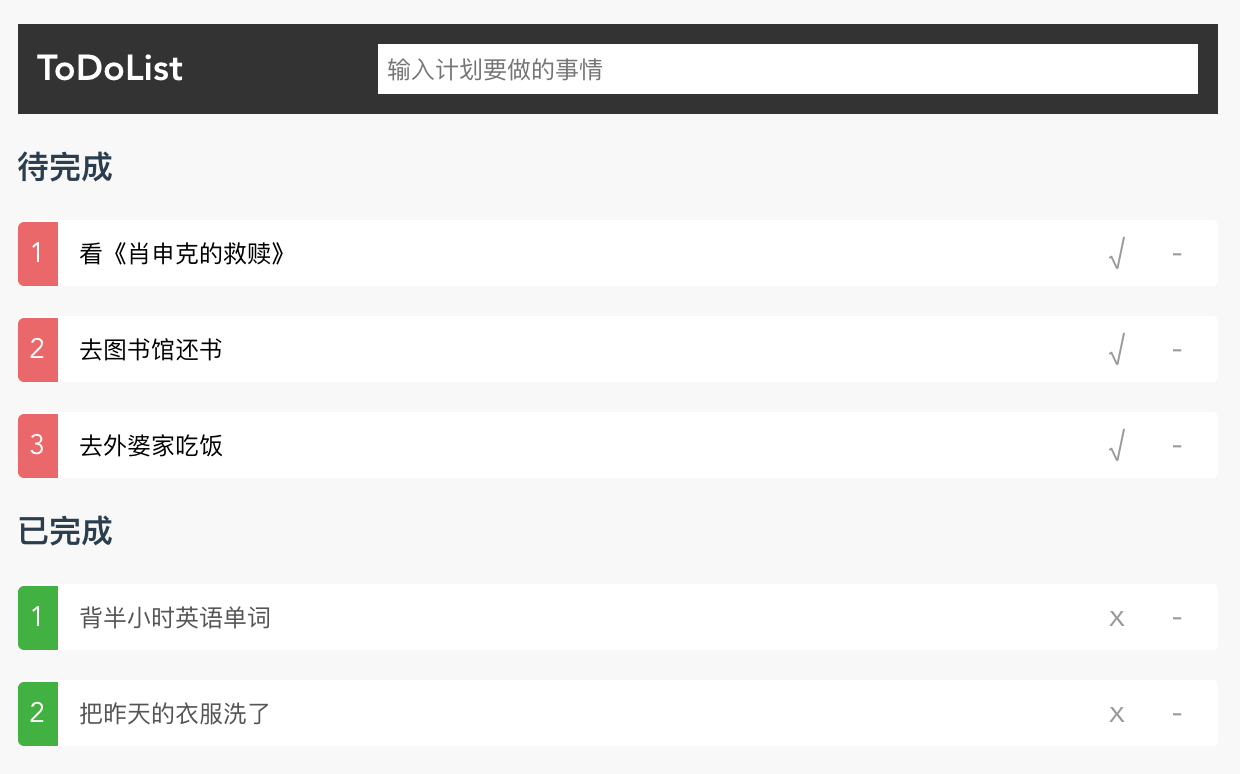
页面写完,原型上的需求也大概开发完成,页面大概长如下样子:
修改目录配置 接下来就是开始编写单元测试文件了,写之前我们先把测试文件目录修改下为 __tests__,同时修改 jest.config.js 为如下配置,注意其中的 testMatch 已经修改为匹配 __tests__ 目录下的所有 .js 文件了。
1
2
3
4
5
6
7
8
9
10
11
12
13
module .exports = { moduleFileExtensions: ['js' , 'vue' ], transform: { '^.+\\.vue$' : '<rootDir>/node_modules/vue-jest' , '^.+\\.js$' : '<rootDir>/node_modules/babel-jest' , }, moduleNameMapper: { '^@/(.*)$' : '<rootDir>/src/$1' , }, snapshotSerializers: ['jest-serializer-vue' ], testMatch: ['**/__tests__/**/*.spec.js' ], transformIgnorePatterns: ['<rootDir>/node_modules/' ], }
编写测试文件 在 __tests__/unit/ 目录下新建文件 todolist.spec.js,我们约定测试某个 vue 文件,那么它的单元测试文件习惯命名成 *.spec.js 或 *.test.js。
1
2
3
4
5
6
7
8
9
import { shallowMount } from '@vue/test-utils' import ToDoList from '@/components/ToDoList' describe('test ToDoList' , () => { it('输入框初始值为空字符串' , () => { const wrapper = shallowMount(ToDoList) expect(wrapper.vm.toDoText).toBe('' ) }) })
上面这个测试文件简要说明:
shallowMount 将会创建一个包含被挂载和渲染的 Vue 组件的 Wrapper,只存根当前组件,不包含子组件。describe(name, fn) 这边是定义一个测试套件,test ToDoList 是测试套件的名字,fn 是具体的可执行的函数it(name, fn) 是一个测试用例,输入框初始值为空字符串 是测试用例的名字,fn 是具体的可执行函数;一个测试套件里可以保护多个测试用例。expect 是 Jest 内置的断言风格,业界还存在别的断言风格比如 Should、Assert 等。toBe 是 Jest 提供的断言方法, 更多的可以到Jest Expect
1 2 3 4 5 6 7 8 9 it('待完成列表初始值应该为空数组' , () => { const wrapper = shallowMount(ToDoList) expect(wrapper.vm.toDoList.length).toBe(0 ) }) it('已完成列表初始值应该为空数组' , () => { const wrapper = shallowMount(ToDoList) expect(wrapper.vm.completedList).toEqual([]) })
待完成和已完成列表,居然是列表,所以存放数据的字段必须是 Array 类型,空列表就是空数组。如果第二个测试用例改成:
1 expect(wrapper.vm.completedList).toBe([])
将会报错,因为 toBe 方法内部是调用 Object.is(value1, value2) 来比较 2 个值是否相等的,和 == 或 === 的判断逻辑不一样。显然 Object.is([], []) 会返回 false。
1 2 3 4 5 6 7 8 9 10 11 12 13 14 15 16 17 18 19 20 21 22 it('输入框值变化的时候,toDoText应该跟着变化' , () => { const wrapper = shallowMount(ToDoList) wrapper.find('.to-do-text' ).setValue('晚上要陪妈妈逛超市' ) expect(wrapper.vm.toDoText).toBe('晚上要陪妈妈逛超市' ) }) it('输入框没有值,敲入回车的时候,无变化' , () => { const wrapper = shallowMount(ToDoList) const length = wrapper.vm.toDoList.length const input = wrapper.find('.to-do-text' ) input.setValue('' ) input.trigger('keyup.enter' ) expect(wrapper.vm.toDoList.length).toBe(length) }) it('输入框有值,敲入回车的时候,待完成列表将新增一条数据,同时清空输入框' , () => { const wrapper = shallowMount(ToDoList) const length = wrapper.vm.toDoList.length const input = wrapper.find('.to-do-text' ) input.setValue('晚上去吃大餐' ) input.trigger('keyup.enter' ) expect(wrapper.vm.toDoList.length).toBe(length + 1 ) expect(wrapper.vm.toDoText).toBe('' ) })
setValue 可以设置一个文本控件的值并更新 v-model 绑定的数据。.to-do-text 是一个 CSS 选择器;Vue-Test-Utils 提供了 find 方法来通过查找选择器,来返回一个 Wrapper;选择器可以是 CSS 选择器、可以是 Vue 组件也可以是一个对象,这个对象包含了组件的 name 或 ref 属性,比如可以这样用:wrapper.find({ name: 'my-button' })wrapper.vm 是一个 Vue 实例,只有 Vue 组件的包裹器才有 vm 这个属性;通过 wrapper.vm 可以访问所有 Vue 实例的属性和方法wrapper.vm.$data、wrapper.vm.$nextTick()。trigger 方法可以用来触发一个 DOM 事件,这里触发的事件都是同步的,所以不必将断言放到 $nextTick() 里去执行;同时支持传入一个对象,当捕获到事件的时候,可以获取到传入对象的属性。可以这样写:wrapper.trigger('click', {name: "bubuzou.com"})
1 2 3 4 5 6 7 it('待完成列表支持编辑功能,编辑后更新toDoList数组' , () => { const wrapper = shallowMount(ToDoList) wrapper.setData({toDoList : ['跑步半小时' ]}) wrapper.find('.wait-to-do li' ).find('input' ).setValue('绕着公园跑3圈' ) wrapper.find('.wait-to-do li' ).find('input' ).trigger('blur' ) expect(wrapper.vm.toDoList[0 ]).toBe('绕着公园跑3圈' ) })
先用 setData 给 toDoList 设置一个初始值,使其渲染出一个列表项;然后找到这个列表项,用 setValue 给其设置值,模拟了编辑;列表项的输入框是用 :value="item" 绑定的 value, 所以 setValue 无法触发更新;只能通过 trigger 来触发更新 toDoList 的值。
1 2 3 4 5 6 7 8 9 10 11 12 13 14 15 16 17 18 19 20 21 22 23 24 25 26 27 28 29 30 31 32 33 34 35 36 37 38 39 it('待完成列表点击删除,同时更新toDoList数组' , () => { const wrapper = shallowMount(ToDoList) wrapper.setData({toDoList : ['睡前看一小时书' ]}) expect(wrapper.vm.toDoList.length).toBe(1 ) wrapper.find('.wait-to-do li' ).find('.del' ).trigger('click' ) expect(wrapper.vm.toDoList.length).toBe(0 ) }) it('点击待完成列表中某项的已完成按钮,数据对应更新' , () => { const wrapper = shallowMount(ToDoList) wrapper.setData({toDoList : ['中午饭后吃一个苹果' ]}) expect(wrapper.vm.toDoList.length).toBe(1 ) expect(wrapper.vm.completedList.length).toBe(0 ) wrapper.find('.wait-to-do li' ).find('.move' ).trigger('click' ) expect(wrapper.vm.toDoList.length).toBe(0 ) expect(wrapper.vm.completedList.length).toBe(1 ) }) it('点击已完成列表中某项的未完成按钮,数据对应更新' , () => { const wrapper = shallowMount(ToDoList) wrapper.setData({completedList : ['唱了一首歌' ]}) expect(wrapper.vm.toDoList.length).toBe(0 ) expect(wrapper.vm.completedList.length).toBe(1 ) wrapper.find('.has-completed li' ).find('.move' ).trigger('click' ) expect(wrapper.vm.toDoList.length).toBe(1 ) expect(wrapper.vm.completedList.length).toBe(0 ) }) it('列表序号从1开始递增' , () => { const wrapper = shallowMount(ToDoList) wrapper.setData({toDoList : ['早上做作业' , '下午去逛街' ]}) expect(wrapper.vm.toDoList.length).toBe(2 ) expect(wrapper.find('.wait-to-do' ).html()).toMatch('<i>1</i>' ) expect(wrapper.find('.wait-to-do' ).html()).toMatch('<i>2</i>' ) }) it('当待完成列表为空的时候,不显示待完成字样' , () => { const wrapper = shallowMount(ToDoList) wrapper.setData({toDoList : []}) expect(wrapper.find('h4' ).isVisible()).toBeFalsy() wrapper.setData({toDoList : ['明天去爬北山' ]}) expect(wrapper.find('h4' ).isVisible()).toBeTruthy() })
一个测试用例中可以写多个 expect 以保证断言的准确性。
异步测试 最后我们为了模拟异步测试,所以加一个需求,即页面加载的时候会去请求远程待完成列表的数据。__mocks__ 目录,同时新建 axios.js:
1
2
3
4
5
6
7
8
9
10
11
12
13
14
15
16
const toToList = { success: true , data: ['上午去图书馆看书' , '下去出去逛街' ] } export const get = (url ) => { if (url === 'toToList.json' ) { return new Promise ((resolve, reject ) => { if (toToList.success) { resolve(toToList) } else { reject(new Error ()) } }) } }
修改 ToDoList.vue,导入 axios 和增加 mounted:
1
2
3
4
5
6
7
8
9
10
11
12
13
<script> import * as axios from '../../__mocks__/axios' export default { mounted () { axios.get('toToList.json' ).then(res => this .toDoList = res.data }).catch(err => }) }, }; </script>
测试用例编写为:
1 2 3 4 5 6 it('当页面挂载的时候去请求数据,请求成功后应该会返回2条数据' , (done ) => { wrapper.vm.$nextTick(() => { expect(wrapper.vm.toDoList.length).toBe(2 ) done() }) })
对于异步的代码,写断言的时候需要放在 wrapper.vm.$nextTick() 里,且手动调用 done()。
配置测试覆盖率 测试用例写了部分,如果我们看下覆盖率如何,就需要要配置测试覆盖率。在 jest.config.js 里新增配置:
1
2
collectCoverage: true , collectCoverageFrom: ["**/*.{js,vue}" , "!**/node_modules/**" ],
在 package.json 的 scripts 中新增一条配置:
1 "test:cov": "vue-cli-service test:unit --coverage"
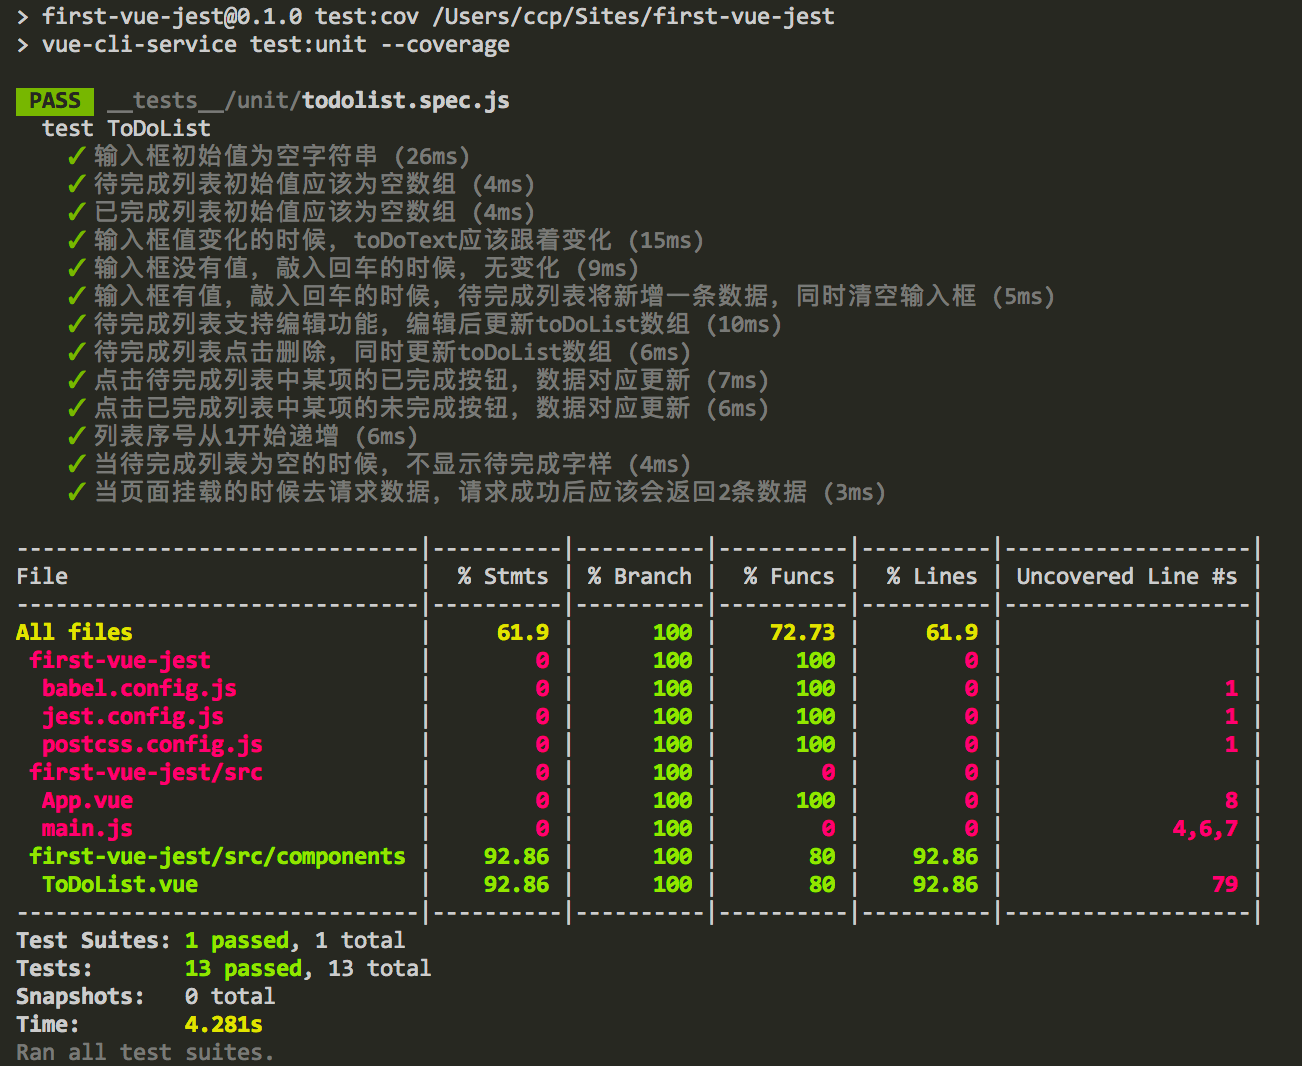
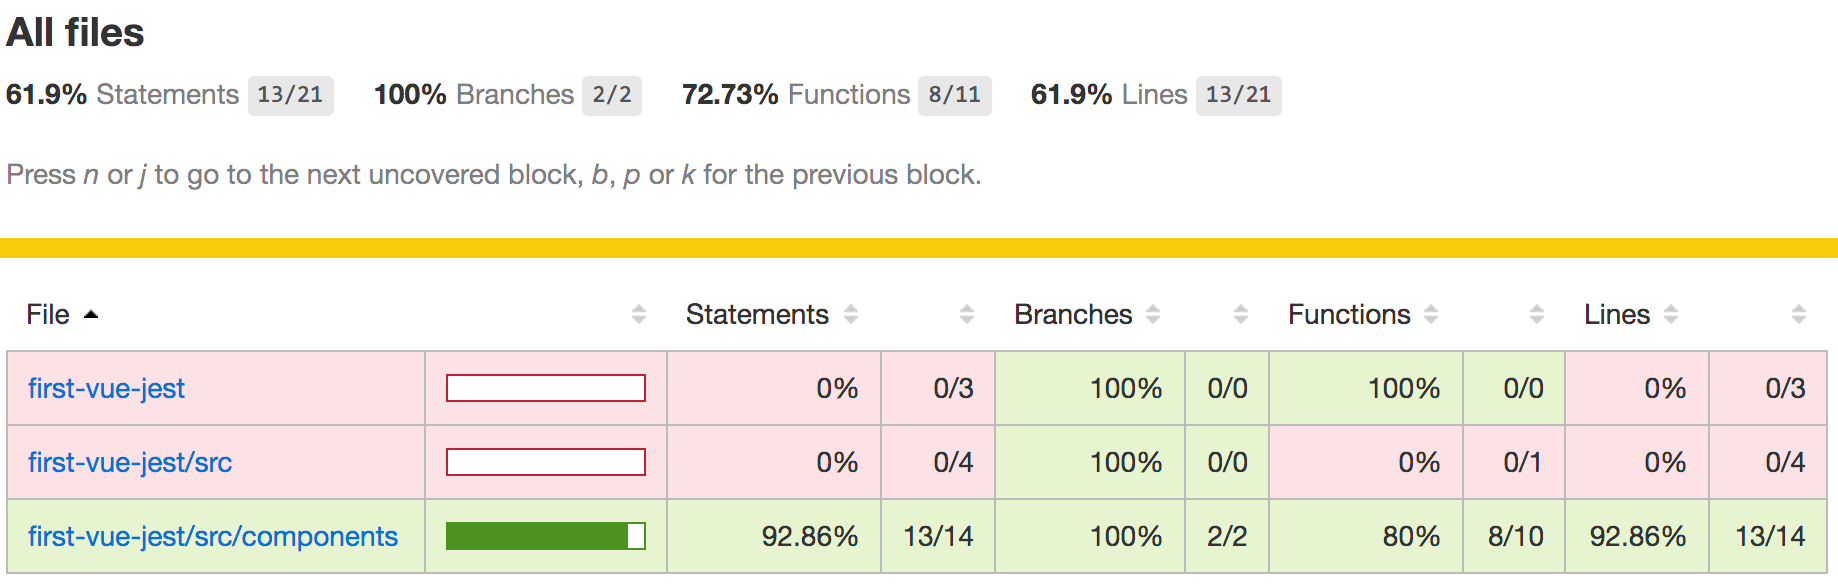
然后我们在终端运行: npm run test:cov,结果如下:
运行测试覆盖率命名后会在项目根目录生成 coverage 目录,浏览器打开里面的 index.html :